Hey, you! Yes, you, the one sitting like a shrimp on your chair, hands grabbing your tablet pen and scribbling away at the screen like there’s no tomorrow.
Your wrist and hand is starting to cramp up, and your shoulder is no different from a solid rock. That’s not good for you! And your art.
You’re at home, but it’s time to rest and take a break.
I know you’re saying, just one more line, one more stroke… and the next thing you know, another hour has gone by.
And you can’t really feel your shoulders or your wrists anymore.
C’mon, get up, walk around your room. Pick up your mug of tea that has long gone cold and brew yourself a new cup.
Maybe bring your arms in the air and stretch a little, really feel that tension in your neck releasing.
Don’t you want to feel better? Feel the strain in your hands and wrists melt away, the pain in your back leave you?
I’ve got just the thing for you, dear artist!
10 Stretches And Wrist Exercises For Artists To Try
Listed below are 10 easy stretches to keep your hands and fingers free from weakness and stiffness after a lot of repetitive movements.
While there is no way to determine the exact cause of your wrist pain unless you get a diagnosis from a licensed physician, you can still do some hand exercises and wrist stretches.
These are recommended as a preventive measure or to ease slight hand cramps that develop due to continuous movement and stiffness in your wrists and hand muscles.
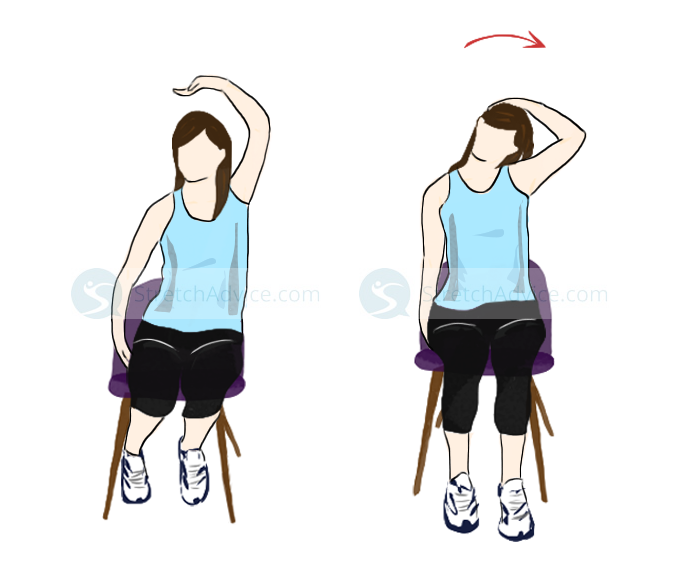
1) Trap Stretch
This stretches the muscles between your neck and shoulder.
- Sit down on a chair, then place your right hand under your thigh, sitting on it.
- Tilt your head to the left and use your left arm to hold your head.
- Hold this position for 30 seconds, then switch side.
- Repeat this set 3 times.
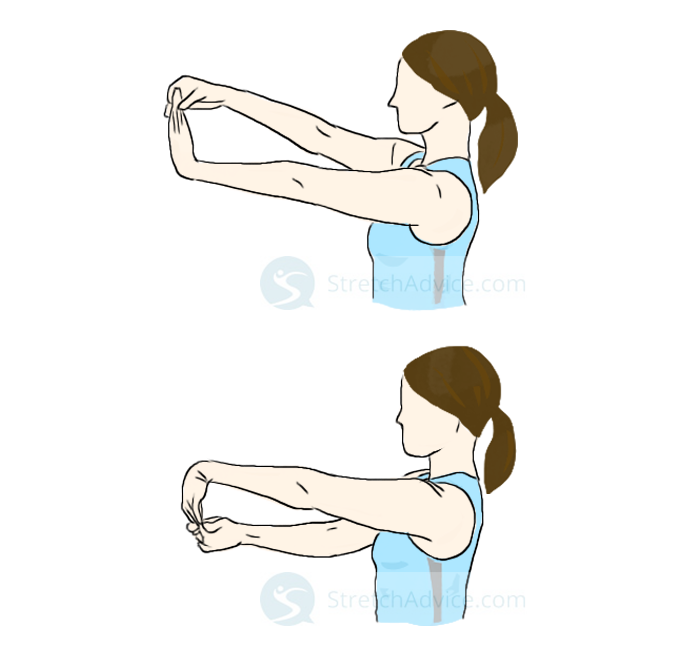
2) Fingers Up and Down Stretch (Wrist Flexors and Extensors)
Ah yes, you’re probably familiar with this one. This stretches the upper and lower muscles in your forearms.
- Extend your arm straight in front of you at shoulder height.
- Flip your hand up like you’re telling someone to “stop”.
- Use your other hand to pull your fingers back, holding for 10 seconds.
- Then flip your hand downward and pull back on your fingers again for about 8 to 10 seconds too.
- Repeat on the other arm.
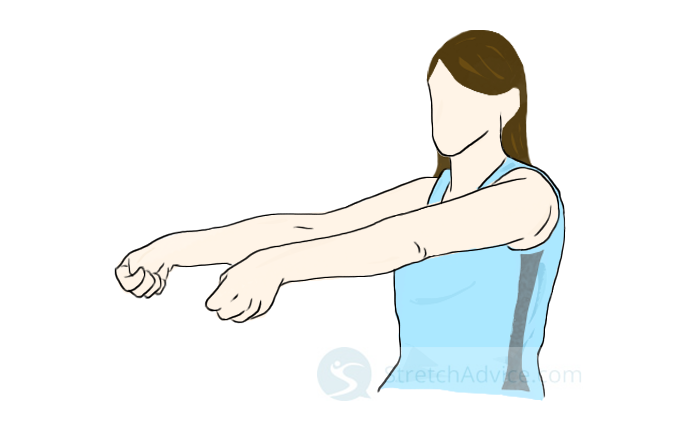
3) Thumb Extensor Flex
This one flexes the little strip of muscles connecting your wrist to your thumb.
- Sit down and extend your arms straight out before you.
- Let your palms face each other and let your thumb stick up toward the ceiling.
- Tuck your thumbs into your palms, wrapping your fingers snugly around it.
- Push your fists downward until you feel a stretch over the top of your thumbs.
- Hold this position for 30 seconds, then rest for 10 seconds.
- Repeat this motion 3 more times on both thumbs.
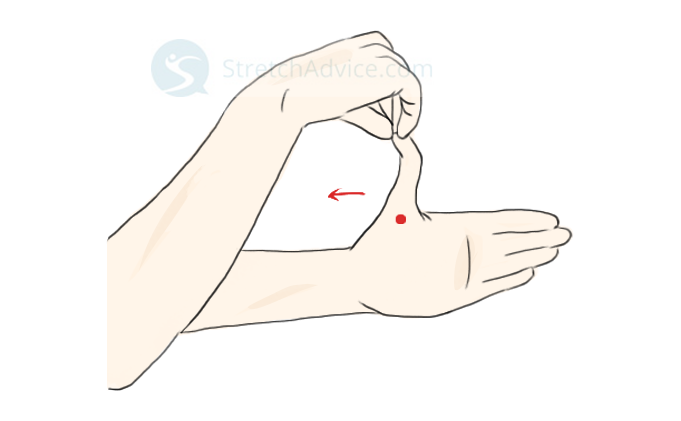
4) Thumb Flexor Stretch
This stretches the webbing that connects your thumb to the rest of your fingers.
- Sit down and extend your arms straight out before you.
- Let your palms face each other and let your thumb stick up toward the ceiling.
- Use your other hand to pull back toward you gently on your thumb.
- Hold this position for 30 seconds.
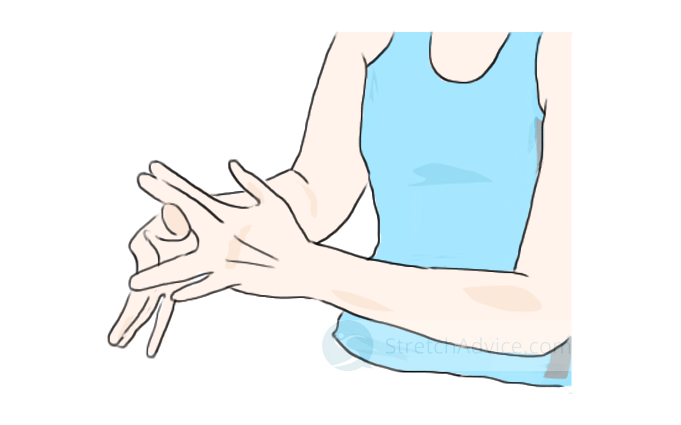
5) In-Between Finger Webs Stretch
This stretches out the webs between your fingers.
- With your palms open, use one hand to spread apart the webs in between each finger. Do one finger at a time.
- Hold each stretch for about 4 to 5 seconds each before moving on to the next finger.
- Repeat one or two times before switching to the other hand.
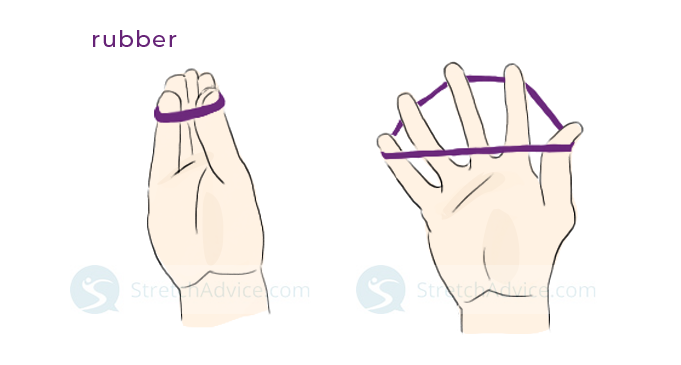
6) Rubber Band Finger Exercise
This exercise builds the strength and motor skills of your fingers. It’s sort of like a mini resistance training boost for your fingers.
- Bring your fingers together so that it resembles a bird’s beak.
- Place a piece of rubber band around all of your fingers.
- Push your fingers out, stretching the rubber band.
- Repeat this motion 8 to 10 times on each hand.
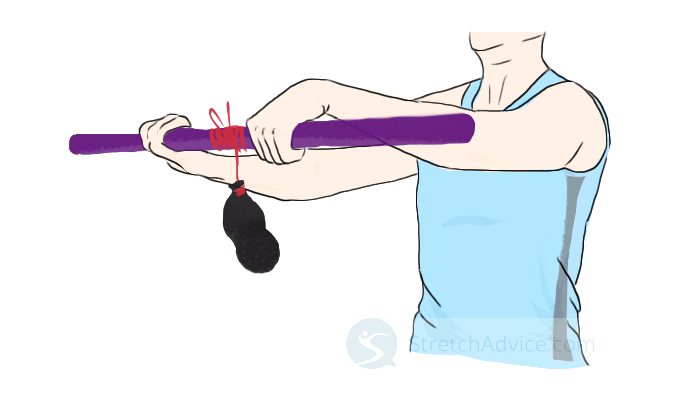
7) Weight Training For Wrists And Forearms
If the previous training is resistance training, this one is weight training for your wrists. You’ll need a prop for this.
- Take a sturdy stick, and tie a length of rope around the center of it. Make sure the knot is tight!
- Tie a light object on the other end of the rope to act as weight, such as two tennis balls or your pen case.
- Hold this weighted stick out in front of you with both hands.
- Rotate the stick so that the little weight tied to it is reeled upward as the rope wraps around the stick.
- Once the weight reaches the top, rotate the stick the opposite way so the weight hangs freely on the rope once more.
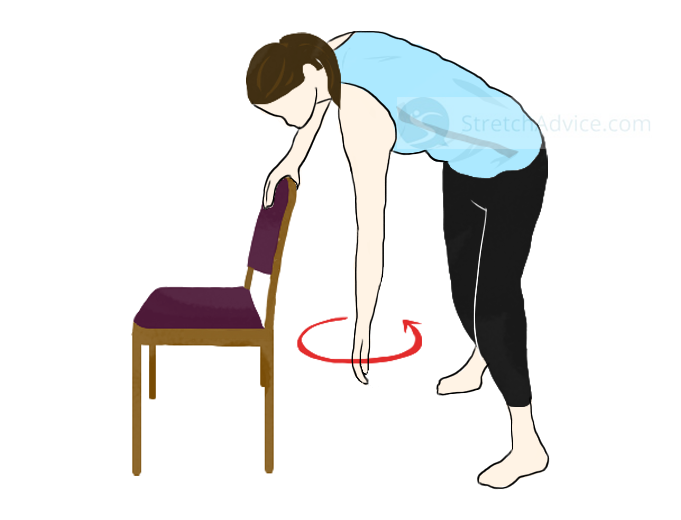
8) Pendulum Shoulders
This stretch will loosen up your stiff shoulders, but you’ll need to stand for this. Oh, and you need a chair or table too.
- Stand in front of your table, extending one arm forward to hold onto the table.
- Let your other arm hang freely from your shoulder as you bend forward.
- Keep your arm hanging loosely as you move your body so your arm swings like a pendulum.
- Make your arm swing in circles first, then sideways, then finally, forward and backward.
- Do this for 10 seconds each, then switch to the other arm. Be mindful not to do this for too long, or you might hurt your upper back.
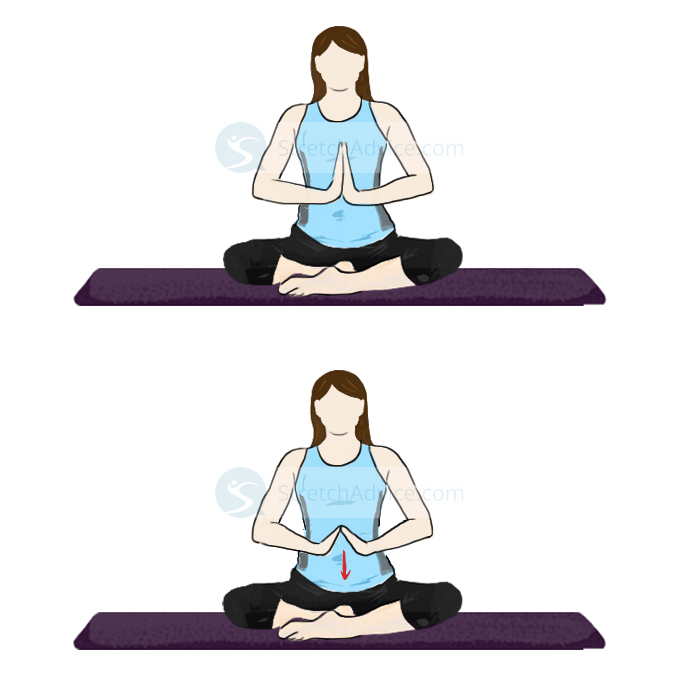
9) Prayer Pose
This one flexes your wrists and forearms!
- While sitting down with a straight lower back, keep your palms pressed together in front of your chest, assuming a praying position with your fingers pointing upward.
- Keep your palms flat against each other as you spread your elbows open toward the floor.
- Lower your hands until you feel the stretch.
- Hold this position for 20 to 30 seconds, then return to the first position.
- Repeat this movement 3 to 4 more times.
- For a more advanced stretch, try putting your hands together behind your back and repeat the exercise by spreading your elbows apart. Not only will it straighten your back, it will also ease slight pain in your wrists.
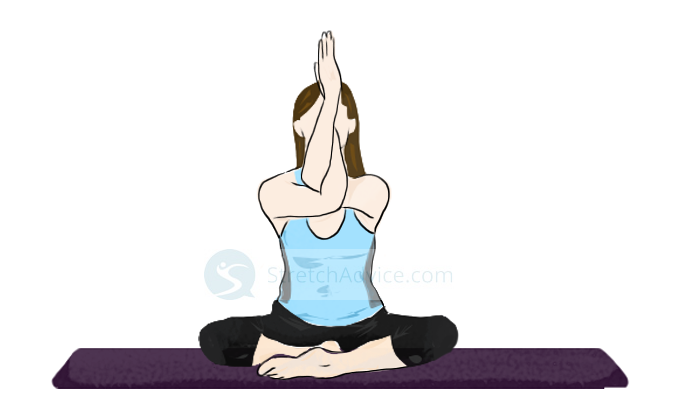
10) Eagle Arms
This stretch is aimed at those stiff shoulders of yours.
- You can do this either standing or sitting, just keep your back straight, then bring your arms in front of you.
- Cross one arm over the other, then raise your forearms, bending at the elbow so your fingertips are facing the ceiling.
- Try to clasp your hands together, but it’s no problem if you can’t place your palms flat against each other.
- Bring your elbows up while keeping your shoulders down.
- Hold this position for about 10 to 15 seconds.
- Return back to normal and cross the other arm over this time, repeating the steps.
The Final Sketch
While these are hand stretches for artists, people who don’t draw or paint are more than welcome to do them too. It’s important for anyone who uses their hands frequently to do these exercises as they can help with pain in your hands.
Stretching does wonders for your body, and if you want to avoid long-term injury to your wrists (carpal tunnel syndrome) then please, make sure to take frequent breaks from making art! Practicing simple exercises can help prevent stress and injury caused by repetitive motions.
Make it part of your sketching routine to stop for a break every hour or so. Set alarms to remind you, then step away from your work to breathe in some fresh air.
Maybe it’ll help you freshen your eyes enough so you’ll know how to fix that crumpled sleeve with your paintbrush that just looks really off but you’re not sure what.
That way, you can continue to create the art that you love!
However, people with inflammation or serious joint damage should always speak to a physician before trying to attempt these stretches. And if you do begin experiencing abnormal pain in your wrists when typing on a keyboard or being a gamer, you should also take some time to visit your local clinic.
Your wrists and fingers help you do a variety of task every day, like gripping a steering wheel as you drive to your local art store, so you’ll definitely want to increase wrist flexibility and help lower the risk of injury.
Keep stretching, and keep sketching!